Wednesday, 11 December 2024

Pimoroni Grow Hat in NodeRED (Part 1 Initial Setup)

 Introduction

We recently set up a plant monitoring system based on a Raspberry Pi Zero and a Pimoroni Grow Hat. It's a great little board that fits over a Pi Zero, giving you the ability to monitor your potted plants. You can connect up to three capacitive saturation sensors, allowing you to ensure your plants don't go unwatered for too long, and there's even three electric pump driver outputs, so you can go 'full-auto'.


Pimoroni's Grow Hat

As you can see from the photo, it comes with a display and four buttons, which allows you to calibrate the sensors, setup alerts, and turn on actions such as automatic watering (if you have the correct pumps). It's really quite impressive what it can do with very little work.

One of the main purposes of this setup was to get it all working in NodeRED, but unlike Pimoroni's Automation Hat, there's no plugin available. The long term goal here was to provide a web dashboard (maybe a few charts) and connect this up to Apple Homekit.

A secondary goal was for my son to learn NodeRED and have a bit of fun.

I'm going to assume you've got a reasonable grasp of installing software on a Raspberry Pi, the online guides are relatively easy to follow, but other than that we're not going to be writing much code.

Initial Setup

Getting the Grow Hat going was easy, solder the header onto a new Pi Zero, install the Raspberry Pi operating system and plug the Grow the board onto the GPIO. You'll need to install the Grow python software, but this is just a matter of following Pimoroni's 'Getting Started Guide', and then the display lit up, ready to go.

The onboard menu allows you to set the wet and dry frequencies for the sensors, and you really need to go through the calibration process if you want the bar graph to accurately represent the water saturation levels. As the pot dries out, the frequency will rise, so the python software tracks that and turn it into a percentage.

There's a simple calculation in the python code, and (assuming a linear relationship) it turns the pulse frequency read at the three GPIO pins into a percentage value. Understanding that means we can replicate the process in NodeRED.

 Moving onto NodeRED

Hopefully you understand what NodeRED is, if not, it's a way of building systems and automation using message flows. There's no programming, as such, you just need to understand the concept and contents of the messages in the flows.

We'll start by running the basic install from the NodeRED installation page for the Raspberry Pi. After it installs, everything else continues in the browser. If you're using a different machine to run the browser on (which I do) you need to use the following address:

http://<hostname>:1880. (You can find the IP address by running 'hostname -I' on the Pi)

In the Manage Palette settings, I added the following nodes:

  • node-red-node-pi-gpio
  • node-red-dashboard
  • node-red-contrib-msg-speed
  • node-red-contrib-moving-average

 I'll go more into these later, but right now we're only interested in the pi-gpio node. Here's how it looks in NodeRED nodes column.


The Pi-GPIO nodes


Drag an 'rpi-gpio in' node onto the flow and set the Pin value to '16 - GPIO23'.

Add a debug node, deploy the flow and we'll see the following values flashing by on the debug tab.

Reading the Grow hat's input from Sensor 1


It flicks between 1 and 0 very quickly, and this gives us a clue how we can replicate the Grow Hat's screen in our flow. The speed that this input changes is the frequency mentioned earlier.

Looking at the Grow documentation, the sensors are on the following pins:

Sensor 116 - GPIO23
Sensor 224 - GPIO8
Sensor 322 - GPIO25

Next time we'll look at turning these signals into a meaningful value.

Tuesday, 16 March 2021

Setting LargeAddressAware in VisualStudio 2019

 Introduction

We write a lot of applications that use a 32bit dll, so we have to compile them as x86 builds. But they also load very large data files so we need to set the LargeAddressAware flag on the executable. While we were using .net Framework we used the LargeAddressAware nuget package and it worked great. This gets us over the 2Gb limit and ensures we don't get out of memory problems.

After starting to create .Net Core applications and we've found that this method no longer works. The setting of the LargeAddressFlag needs to be set on the executable, but the nuget package now applies this to the dll.

Setting the flag in Core

We're had to fall-back to creating our own post-build processing that uses the macros to build the location to the compiled executable. Here's how we did it:-

  1. Go to your project property settings and select the Build Events page.

  2. Enter the following code into the Post-build event command line.

call "$(DevEnvDir)..\tools\VsDevCmd.bat"
editbin /LARGEADDRESSAWARE "$(TargetDir)$(TargetName).exe"

The first line adds editbin to the path, and this is correct for Visual Studio 2019. At some stage this may need to be updated, and older versions of Visual Studio probably won't work.

LargeAddressAware added in Post-Build


Saturday, 4 January 2020

Improving Telecaster Intonation

Introduction

Earlier this year I built a telecaster from parts and I tried my best to make it look traditional / vintage with my choice of parts. This meant using a three saddle bridge, which I knew was always going to be a compromise. The bridge I bought at the time was a cheap rip-off of a Gotoh modern style tele bridge, but with only the top loading option. Although it had been advertised as compensated, in practice I found it rather lacking.

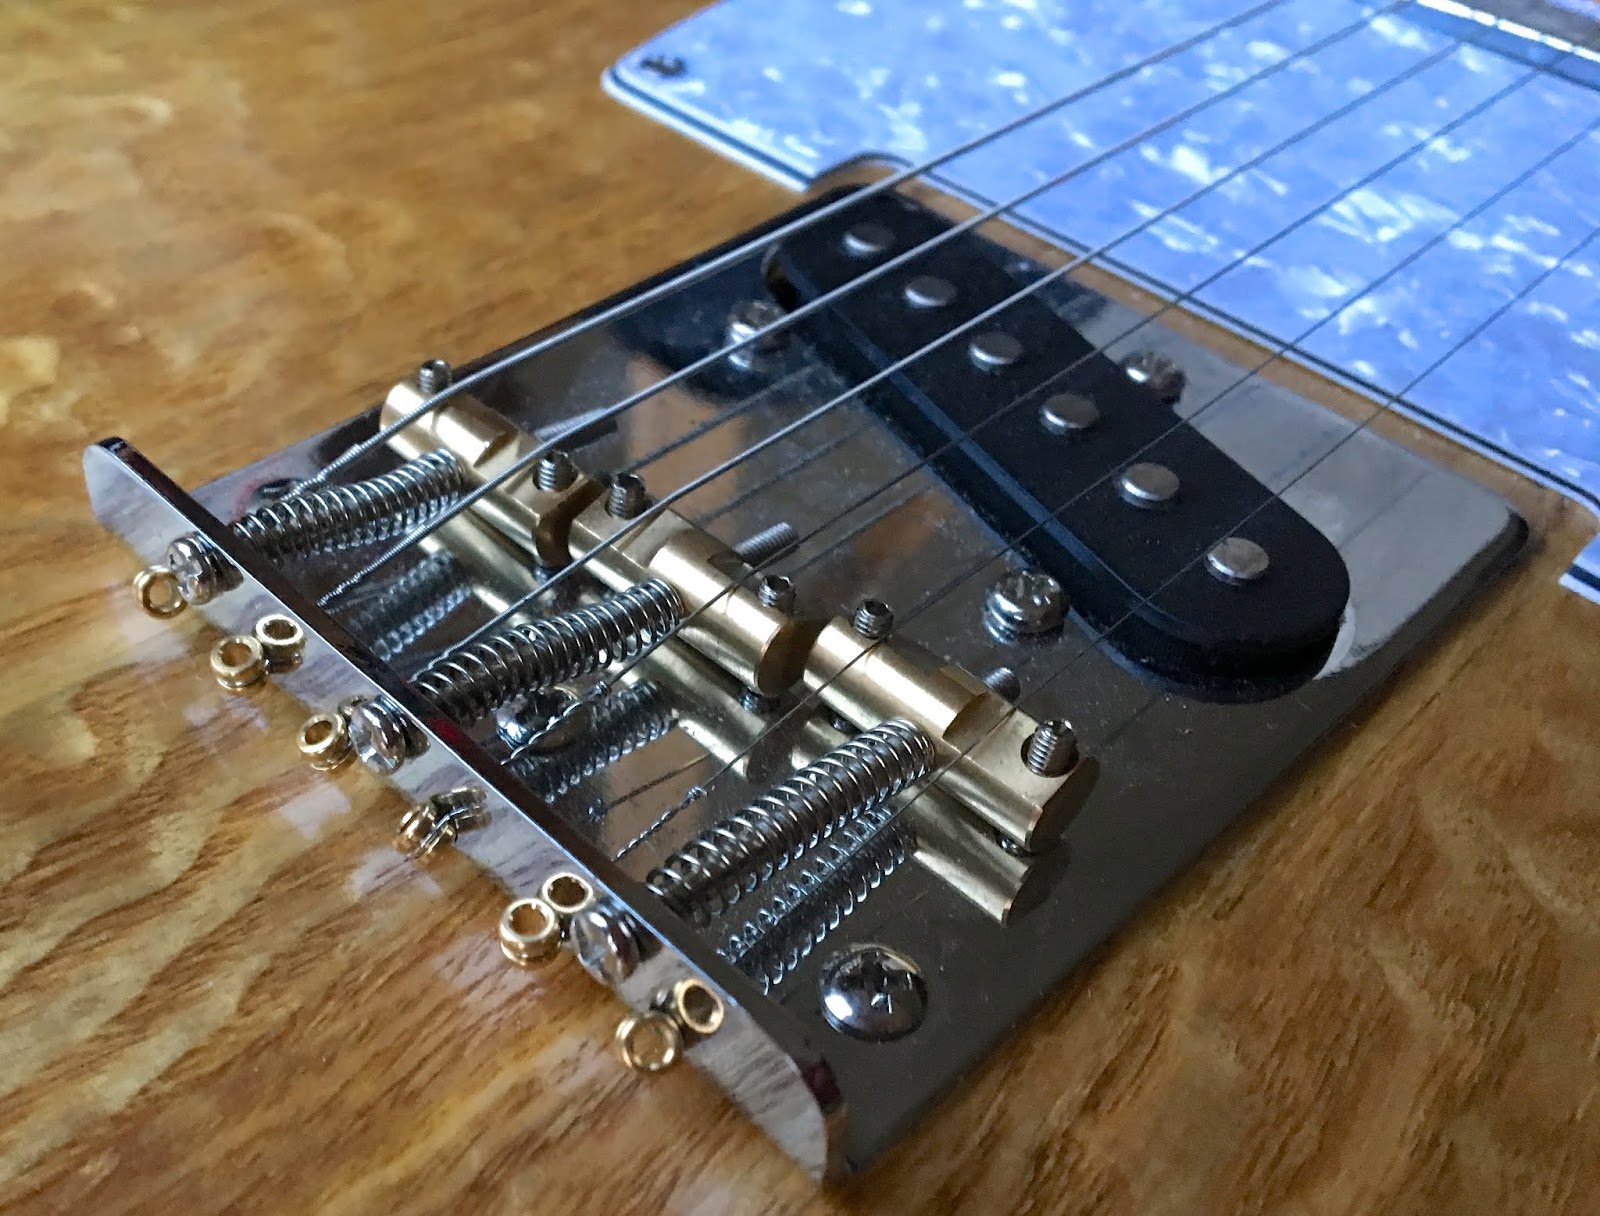
Here's what the bridge looked like before I started..

The Original IOZ5 Steel Bridge
I didn't have a lot of choice due to the limitations of the body and routing, but this unbranded top-loader style bridge does the job. My intention had always been to upgrade the saddles at a later date.

Upgrade Time

Much of the electrics and hardware came from Northwest Guitars, I'm not endorsing them, they don't sponsor me, but they seem to be a good retailer for parts in the UK. I found they stocked just the thing I wanted, compensated brass saddles. They are essentially unbranded, low cost, and identical to Wilkinson Vintage Compensated saddles.

They arrived a few days later in a simple ziplock bag..

Compensated Brass Telecaster Saddles

They have been nicely machined, have shorter height screws and mounting bolts than those I have fitted, but the screw threads match perfectly. Also if you look closely you will see that one of the saddles is different to the other two. This surprised me at first (Northwests' photo showed them all the same), so I had to do a quick look on the web to see this was correct.

Odd one out goes in the middle!

The reason for this inconsistency is that the middle saddle caters for both a wound and unwound string. Northwest suggest if you are using a wound G then this middle saddle can be flipped over, but for now I'm going to assume the manufacturer knew what they were doing.

Fitting The Saddles

Installation was simply a case of loosening each pair of strings, marking the approximate saddle location with a bit of masking tape and then swapping them out. Even if you take your time, you'll be done in 10 minutes. (remembering the odd one goes in the middle)

Compensated Saddles Fitted
Then it was just a case of getting my tuner out and re-setting the intonation. You soon start to see the two diagonal lines pattern you expect to see on a bridge and I've gotta say, with these new saddles fitted, you really can get intonation close to perfect.

It's amazing how much better a guitar sounds when it's in tune as you go up the neck.

An additional benefit with the shorter height screws is that they don't poke up so high, nor are they as sharp as the previous ones. All-in it's a cheap and very positive improvement to my guitar.

Wednesday, 16 October 2019

Building A Partscaster (Telecaster) Part 7 - Finishing Off

Introduction

With the wiring mostly done, the last stage was to add my chosen pickups, get the control plate mounted and fasten down the scratch guard. These should have been easy tasks, but that non-standard body was continuing to threw spanners in the works.

The control plate was overlapping one of the pickguard screws.

The Route to Success

After some thought, I took the decision to alter the body, as it's already been modified and repaired at the bridge routing. The control cavity would have to be widened on one side, but not having many woodwork tools, I wondered how best to do this. (chisel, Dremel with circular blade, drill loads of holes?)

I was sure most of the methods I had available to me would look terrible, so I ordered a cheap mini-router from eBay and a selection of router bits.

My new Katsu mini router
This isn't a review of the router, although I will say after a little practise on some scrap wood I was very happy with the results. I measured the gap from the edge of the router to where the cut was made and this gave me my offset.

Next I clamped a wooden guide onto the guitar body using this offset and a line I'd made on some masking tape to mark the new cavity edge. All I needed to do now was set the router depth, hold my breath and start cutting.

The body ready for routing
I had to do two cuts at different depths because the cutting tool wasn't deep enough, but this reduced load on the router and gave me more control. I took my time, being careful to avoid burn marks and to freehand the curved ends.

The completed routing (the black line marks the edge of the plate).
I also cleaned up where the cavity had been chiseled out to give the switch more space. There's not a lot of wood depth here, so I removed very little. I had to unsolder and pull the ground wires back before I started, and here you can see I've re-attached one of them.


The pick guard stills needs modification.
With the control cavity done, attention turned to the pick guard. The extended cavity now lines up better with the pick guard cutout, but it still needs modifying a little. I drew round the control plate with a marker pen and then used a rotatory file on my electric drill to rough it out.


The pick guard modification completed.

I finished off with a fine half-round file and re-checked that everything fitted well. The screw holes were then marked and drilled with a 2mm bit.


The copper shielding in place. (notice twisted pickup wires to reduce hum)

The body had been shielded with copper tape, so before finishing the electrical work, I replaced this with gardeners anti-slug copper tape. This stuff is quite cheap, I just cut off the serrated edges or trimmed down as required. I then applied a little plumbers flux to the stuck down edges and soldered all the pieces together. (They need to form one continuous cover)

The pickup mounting springs were replaced with neoprene tubing, and I found that a little bit of lubrication helped them fit over the pickup mounting bolts. It's a common modification that removes microphonic pickup noise, but I figured it was better to do it now. Then it was onto the socket.


Modern screw fitted output jack.
I'd read that you need a special tool to fit telecaster socket mounts, and while I liked the idea of being authentic, it sounded like a load of hassle. Most people seemed to be removing them and fitting these screw mounted sockets that don't go loose or wobbly. So that's another upgrade pre-fitted.

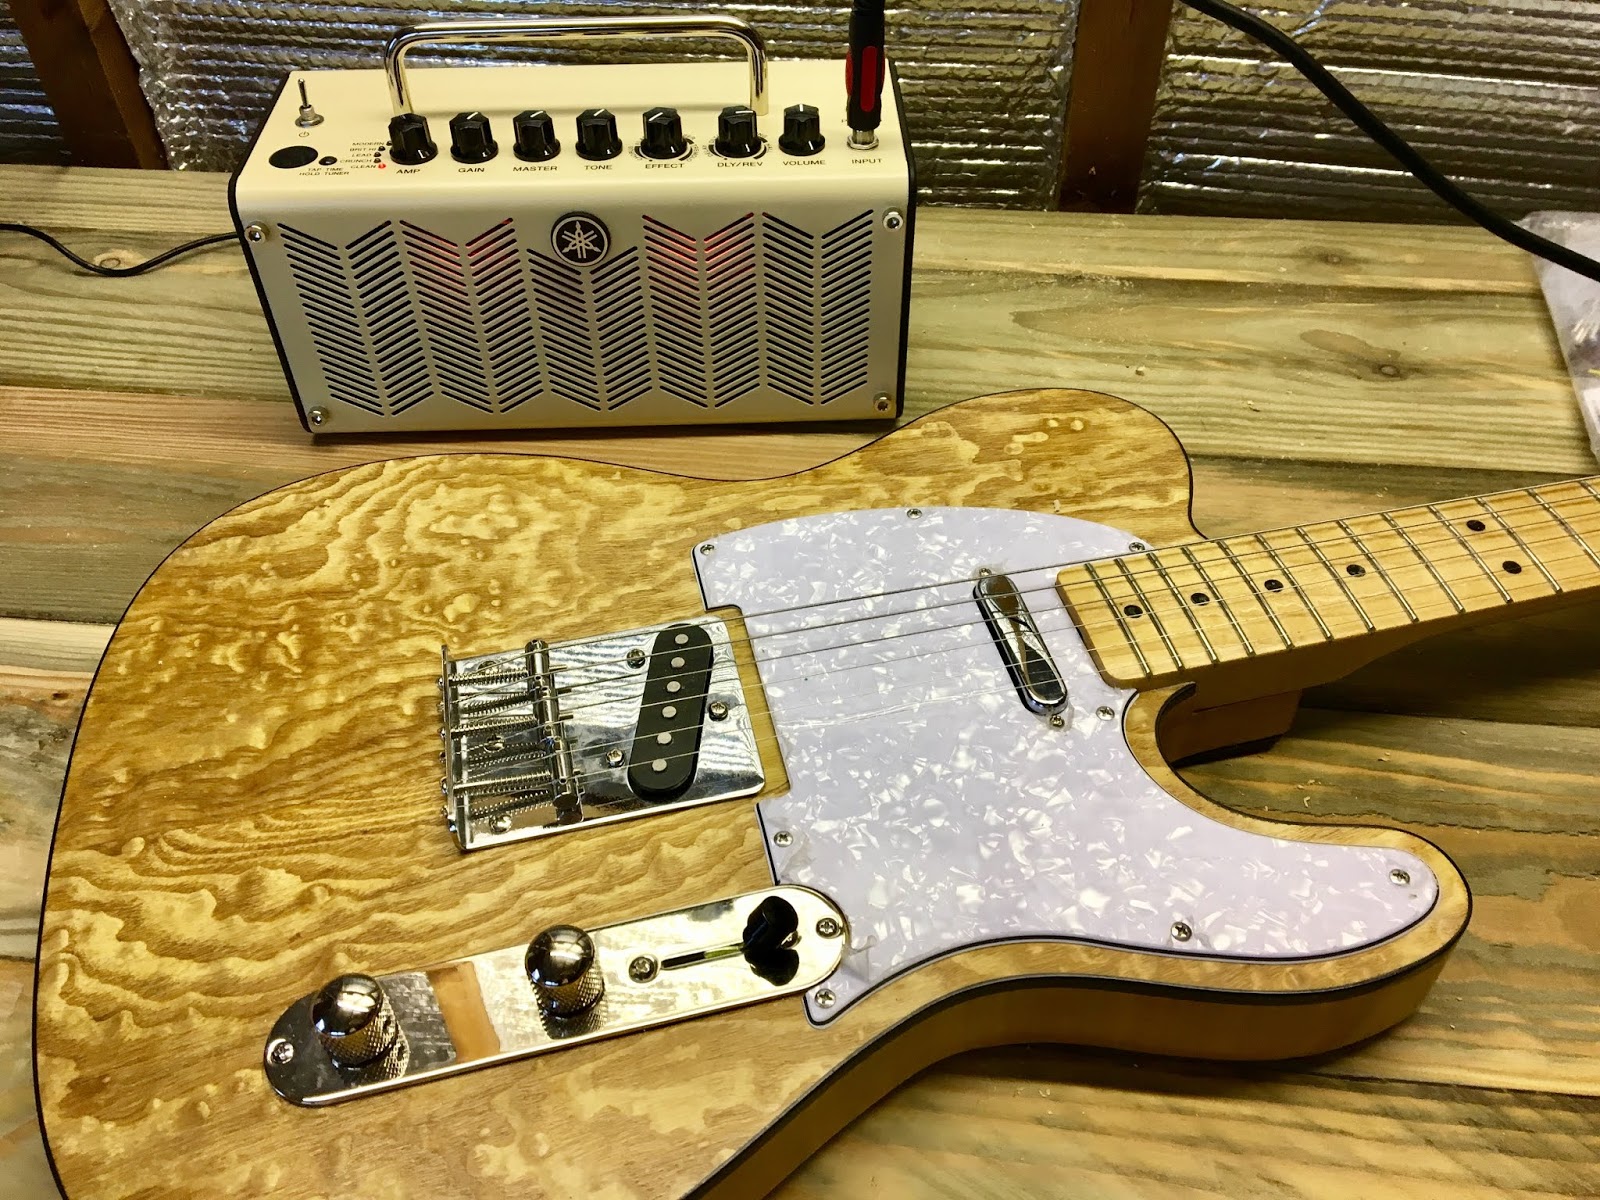
The final step was to solder the pickups and output jack onto the pre-wired control plate and ensure all ground connections were made properly. Screwing things back together before testing is tempting fate, so I plugged it into my THR5 amp and checked the wiring before buttoning it all up. To my surprise everything worked, those Seymour Duncan wiring diagrams were spot on.

The completed guitar body.
And here is the finished guitar, ready to be set up and played. Initial tests revealed a very trebly sound which was easily tamed by backing off the tone control. The series switch mode (in position four) had bags of volume and then the phase switch on the tone-pull really thins-out the sound.

I like it.


Sunday, 13 October 2019

Building A Partscaster (Telecaster) Part 6 - Pickups

Introduction

The basic guitar is now working in an acoustic way and the control wiring is done, so it's time to move onto the pickups. There are a few design elements that create the "telecaster" sound, but the most important thing is the pickups. They have evolved throughout the years from Leo's original lapsteel pickup, to the modern noiseless pickups that are voiced to sound like they've come from the 1960's.

Ideally I'm aiming for a 1950's sound, but as I started researching, I became bombarded with specs that don't match up to what's readily available today. In fact, the more I looked into it, the more a minefield choosing pickups became. But what's so special about telecaster pickups?

Pickup History

The thing that's quite obvious on a Telecaster, is how unique the pickups are. There's that large pickup built into the bridge, paired with a smaller chrome covered neck pickup, which reminds me of the dissimilar size wheels on a chopper.

Telecaster Pickups.

The original tele was called the Esquire and it only had the bridge pickup. Leo's design used a copper or zinc plated steel base plate with alnico pole pieces and had a relatively low output compared to today's pickups.

The Fender Esquire Pickup

Bolting this directly into the steel bridge focused the magnetic field in a way that made the sound brighter. In fact the resulting sound was too bright and the guitar relied on a series of switched capacitor circuits to tame the harsh trebly tone. Together with its lack of truss rod, (which saw many of the first batch of guitars returned due to bent necks) showed this design to be little more than a stepping stone along the way.

The Bridge Pickup

The bridge pickup isn't too unusual at first glance, but there are two important differences. First it has that steel base plate, and secondly it uses the bridge as an integral part of its magnetic field.

Left bridge pickup, right comparison of magnetic fields.
Compare the bottom field diagram from a telecaster with the one above from a stratocaster. The concentration is clearly stronger, while the pole piece magnets themselves are about the same strength.

The Telecaster neck pickup started out with 43AWG enamelled wire (with a 10kΩ resistance) and soon switched to thicker 42AWG wire (with a 7.8kΩ resistance). They initially had alnico III pole piece magnets, but this was later changed to alnico V and the windings reduced to around 6 to 7kΩ. Standards were pretty loose back then, so windings on the coils could vary by hundreds of turns, and the pole pieces themselves weren't always guaranteed to be Alnico V spec.

The Neck Pickup

The neck pickup was added to the later broadcaster and subsequent guitars, and uses a smaller narrow coil with a metal covering. Typically the neck pickup is as described as "dark" sounding, while the bridge pickup is "bright", and this leads to good mix when the two are used together. The cover itself darkens the sound and it can be removed to open the sound up a bit, to the detriment of increased hum.

It's hard to say much else about this really. It's not uncommon for guitar players to swap out the neck pickup because they're pretty uninspiring, but as I've got no experience with them, my plan was just to get something typically telecaster and see how I felt about them.

What To Buy?

The more research I made, the more variation there seemed to be in Telecaster pickups. In those first few years of the 50's they changed so much, and then there was the changes into the CBS era. I read a lot of reviews, watched a lot of demos and still failed to make a buying decision. It didn't want anything 'hot', expensive, or particularly special in any way. But I had little to go on, other than I wanted alnico magnets rather than ceramic, and low output levels.

I nearly went for Tonerider Hot Classics, the price was reasonable and they sounded okay, but like most of the premium brands, they seemed to only offer slightly hotter versions.

In the end, I spent a very modest £17 on some unbranded alnico V pickups with coil resistances in the right ball park. I'm not a great believer in hype and it's unlikely I'll see any difference to the more expensive pickup sets with similar specifications (which I have no experience of anyway).

Cheap Alnico V pickups from eBay

So, here's what I bought, something not far from the 1955 spec, which should be bright and twangy. My plan is, they'll do for now and can always be swapped out later if I don't like them.

Thursday, 3 October 2019

Building A Partscaster (Telecaster) Part 5 - Wiring

Introduction

We mostly think of guitars with two pickups just needing a three selector switch. Be it the Gibson style toggle, or the Fender lever style. But while researching wiring circuits I came across Fenders Baja wiring which uses a four position switch and Fender's S1 Switch. This intrieged me so much that I decided it was worth the slight increase in the cost.

Choosing Parts

Yeah we're back here again, but this time we've got all the tricky decisions sorted. It's simply a case of getting the following parts:-
  • Pots
  • 4-Way Switch
  • Socket
  • Tone Capacitor
  • Phase Switch
  • Wire

Pots

Fender uses CTX potentiometers, but you can save a little bit of money going for the CTX brand directly, rather than the ones available from Fender.

But, if you go for Alpha pots, these are comparable size and quality and about half the price, but the main advice I read seemed to be, "stay clear of unbranded or mini pots"

CTX pot with split shaft, Alpha pot with solid shaft and push-pull Alpha pot.

The other thing to be aware of is that they come in linear or audio taper tracks. Most guitars use the audio type.

You also need to consider whether to buy solid or split shaft. This normally depends on the type of knobs you intend to use.

4-Way Switch

You will basically find two types of lever switch, especially on eBay. There's the high quality Oak Grigsby style, or the cheaper circuit board type. They'll both do the job, but the O-G type will last longer than the other.

The two types of switches available, left Oak Grigsby, right circuit board type.
It's also worth considering the Oak Grigsby style has open wafers which can be more easily cleaned.

Socket

Your choice is similar to the switch, you can get a heavy duty Switchcraft style switch which can be easily cleaned, or a moulded plastic type. You need to be aware that there are metric and imperial threads, so ensure they match the jack plate you intend to use.

Tone Capacitor

And now we come to contentious bit... a lot of people will swear that for the best tone, you have to use a Paper-in-Oil (PIO) capacitors. Others will use "Orange Drops" which are polyester, and some say old "Bumble Bee" capacitors are the best, which are a PIO type often advertised as giving a "Woman Tone". You can pay silly money for these, and the truth is they won't sound any different to a polyester type, it's just another one of those myths.

You can in fact use any type, although I've heard that ceramic disk type can be microphonic, so are best avoided. You still see them in cheap guitars though. What ever's practical and convenient.

My advice here is to buy the correct value, (0.047uf for Fender single coil) and if you get them from an electronics supplier you can get them for a third of the price. (I bought a pack of ten for £1.35)

Phase Switch

If money's no object then you can pick up an S1 switch from fender. Any double-pole, double-throw switch will do the job, so it's down to preference. I went with the push-pull alpha pot so it's built into my tone control.

Wire

Some will say it has to be the vintage cotton covered hookup wire. But the truth is, it makes no difference to cheaper PVC wire. I suppose it's another one of those personal preferences, you either want to go fully vintage with a PIO cap, or you accept nobody's going to see it and just buy what works well.

My Completed Control Panel

Here's my completed panel, I based it on a wiring diagram I downloaded from Seymour Duncan. I altered this slightly by using my phase switch on the bridge pickup. You also need to run a separate ground wire from each of the pickups.

The Baja wired control plate using a 4 way switch and a switch tone pot.
You should also run your grounds in a star configuration, avoiding any loops (which will introduce hum). For instance, if you have two separately grounded parts, don't touch them together.

Thursday, 19 September 2019

Building A Partscaster (Telecaster) Part 4 - The Bridge

Introduction

If you remember back in my first post, I mentioned the bridge pickup routing had been enlarged. I was hoping that the bridge I bought would cover it (and it does), but one thing that was really bothering me was that it seemed to be in the wrong place.

Comparing dimensions (Fender on the left)
I hadn't noticed before how the shape of the body differed from the Fender shape. Not only is it wider at the bottom, but the top left is less pronounced. The control routing is slightly higher, and you can see from the blue line that the bridge positioning is wrong.

This is probably going to make tuning and intonation impossible.

A Closer View

I was a bit annoyed, so I messaged the vendor on Ebay. He sent me photos of the old bridge he'd taken off it, and it seemed to match the one I'd bought. Maybe it will work, but until the neck had arrived I didn't know for sure.

The photo from the vendor

My bridge has the same dimensions and those mounting holes match exactly.

My bridge showing the measurement from the nut.
A few days later, the neck arrived and it became clear (with a neck scale of 25½ inches) that those saddles won't go back far enough. It might have had a shorter scale neck before, or maybe it was gooched and this explains why the donor guitar had been stripped for parts.

Not a huge problem you might say, just drill new holes and mount it in the right place?

Yeah, but that will uncover that ugly botched hole!!

Filling the Hole

There was no choice if I wanted it to work properly, the bridge has to be in the right place and I needed to replace the missing wood from the body. Here's the steps I took:-
  1. Make a paper template.
  2. Glue template onto pine block (soft wood is easier to work with).
  3. Cut out and sand into a close fitting shape.
  4. Remove copper foil from the hole and glue block in with PVA.
  5. Repeat with a piece of thin ply with a similar grain to the body veneer.
  6. Stain a golden colour (I used a mix of coriander and tea).
  7. Apply four coats of varnish.
Left the completed body repair, right with bridge and pickguard fitted.

Okay it's not great, the resulting colour isn't quite right, but once the bridge and pickguard are fitted, most of it is hidden. In fact you have to look quite closely to notice it.

Fitting the Bridge

I used the "fit the two E strings" method to position the bridge, ensuring the strings sat in the right nut slots. I pulled the strings tight, ensuring the gap to the fret board edges is the same both sides and the bridge was square. It took me a few attempts before I was happy, so if you're doing this, double check before you start drilling holes.

Once that was done, I couldn't resist throwing some strings on and trying it out.

Sunday, 15 September 2019

Building A Partscaster (Telecaster) Part 3 - Fitting the Neck

Introduction

I've got to say, choosing the parts for the build has been quite a challenge. After ordering a 1951 style neck, I decided it would be good to try and get hardware to match. I'd already bought a 97mm standard bridge to cover that enlarged pickup routing, so it wasn't going to have the traditional ashtray style. I does at least have just three saddles. But now I was starting to be concerned that it wasn't going to work, but more about that at a later date. Here's a photo of most of the parts, before I started building.

I've been busy on Ebay

Mounting the Tuners

I really like the idea of split shafts on the Kluson tuners. The guitar string goes down the hole in the middle, so there's no sharp end waiting to spike you. But what I thought would be a simple job, became complicated.

The vintage Fender neck is supposed to have 9mm tuner holes. The Kluson's are a simple pressed steel design, authentic for this era, but the press-in bushes were too loose. The holes in the neck were actually 9.4mm with the bushes being 8.6mm, so I was a little confused as to whether I'd bought a 9mm neck or a modern style 10mm one. I could pay £10 for the 10mm bushes, but that felt like a lot to pay, I'd then still have to open the holes a little, and I'd have to delay the project.

In the end, I painted the inside of the holes with varnish (about 5 coats) until they fit snuggly.

Fitting The Neck

If you buy a non-fender body, the specs may not be standard, and in my case this was definitely true. In my case the over-all shape is slightly different, and the neck was loose in the neck pocket. If left like this I would always have re-alignment problems whenever I took the neck off.

The solution is simple enough, I glued a piece of veneer to the bottom side of the pocket.

A small piece of veneer makes the fit snug.
The neck was a tight fit now so I grabbed the neck plate and bolted the neck on. Having the holes pre-drilled was great (thanks Fender), finally something easy.

The neck fitted and complete.

I now had something that looked like a guitar, and the next step is fitting that bridge. It turned out to be a problem, so I'll cover that in the next blog.

Thanks for reading.


Monday, 9 September 2019

Building A Partscaster (Telecaster) Part 2 - The Neck

Introduction

Continuing on from Part 1, I'm switching focus to choosing a neck for the project. On Ebay it's a similar story to shopping for bodies. While we should focus on how good the neck does its job, we are more likely to buy what looks good, or some bargain with the right logo. But beware, while there are a lot of flame maple necks that look great, we should remember the old adage, if something seems too good to be true, it probably is.

Here are a few important things that you should consider:-
  • The quality of the build.
  • The stability of the wood.
  • The fender logo.

Fun On Ebay

Before I go through these points, let's just consider what's available on Ebay for a moment. You will see everything here from unbranded Chinese necks, made under licence boutique ones, and real fender necks. You will also find loads of second hand stuff that nearly always has had a fender logo added to it. So you'll have to look closely and buy with care.

I found that any legitimate Fender neck will go for a lot of money. I watched a couple of Made-in-Mexico necks (pre-fitted with Kluson tuners) complete their auction for more than the new price. Even Squier branded necks are going for close to the price of a complete guitar, so there's clearly money in breaking guitars up for their parts.

Don't Ignore Quality

Once you start looking, you'll see a huge amount of cheap stuff available, and while they're all made from maple, the one thing you need to consider is, how well? The wood needs to be properly seasoned because when freshly cut wood dries it shrinks and warps. Using it too early could result in any number of the following problems:-
  • Twisting along its length - making set-up difficult or impossible.
  • Fret-Sprout - where the neck shrinks causing the sharp fret ends to protrude.
  • High patches along the fingerboard - causing fret buzz.
  • Poor adherence to the specs - meaning the fit in the neck pocket may be loose, or there may be cosmetic issues.
The other quality issues related to the frets. What they're made of and how they're fitted will have a big impact on the playability of your guitar. Expect fret buzzing problems on cheaper necks, which is often caused by:-
  • High frets - due to lack-of, or poor fret levelling work.
  • Lifting frets - where the tang is loose in the slot.
But you should also be aware that you are likely to get sharp fret ends on cheap necks.

While a lot of the fret problems can be fixed with a little effort and know-how, any issues with the wood are likely to be terminal.

The Fender Logo

Whether or not you have the Fender logo on your headstock is down to taste. To many it will make a neck more desirable, and it's worth saying that water-slide fender transfers are quite easy to get a hold off, so be wary of second hand necks. While having an authentic Fender, or licensed neck is a good way of ensuring high quality, be careful about what or where you buy. There's an awful lot of fake stuff on Ebay, so if you're unsure ask yourself the question "is it too cheap?"

After much deliberation, I decided to buy a 1952 spec Mexican, Telecaster neck from DV247. The price was pretty good and although I had to wait a couple of weeks for delivery, I'm impressed by what they sent me.

A well packaged set of boxes.

The outer brown Fender box showed signs of being re-sealed, so I imagine DV247 have inspected the neck before dispatch. The contents arrived in perfect condition and it was a pleasure to open that final white box.

The neck, pre-drilled and ready to go.

The neck itself has the silver spaghetti style logo and is pre-drilled ready to go. It has a 9.5" radius fingerboard, twenty one 6105 frets, and the truss rod adjuster is at the base of the neck. The profile is a vintage 'U' shape that's quite chunky, its finished in clear gloss urethane and fitted with a pre-slotted synthetic bone nut.

On to part 3

Sunday, 1 September 2019

Building A Partscaster (Telecaster) Part 1 - The Start

Introduction

For a few years now I've wanted to build a Telecaster from parts (or partscaster, as they're known), but I've never had the time or space. Although I've never been a Tele fan in the past, the simplicity and character of this early guitar has really started to appeal to me. I have my own place now, I've not bought a new guitar in years, so I feel it's time give it a go.

My ideal build would be a vintage sounding guitar with that authentic twang that you'd associate with those early Fenders. So, no hot pickups, individual bridge saddles, locking tuners or modern body-cuts for me, but a chance to learn about the history of this instrument in a very practical way.

Less Than the Sum of the Parts

Just to be clear, a guitar made up from parts is always going to be less valuable than a genuine Fender, so there's no point doing this if you want to sell it down the line for for anything like it's value. It's not going to be as desirable as a genuine Telecaster, it's just a partscaster, so your best hope for recouping value would be to break it back up and sell the parts on Ebay.

Which brings me to the focus of the project. What is my strategy and desired endpoint?
  1. Build a 'T' shaped guitar from parts. (I don't have the woodworking tools to make a body and neck, and those cheap kits generally get terrible reviews)
  2. Try to use second hand stuff where I can. (Ebay)
  3. Use medium to high quality parts where it matters. (Use cheaper parts when it doesn't)
  4. Build something that sounds and feels vintage. (The pre-CBS, 50's era, ideally)
With the overall aim being, try to do it without spending lots of money.

History

According to wikipedia, the Telecaster (Broadcaster, Nocaster or Esquire, as it has also been called) was one of the first solid body electric guitars, and it was originally made from ash and maple. Later alder was often substituted for ash, and unlike other guitars at the time, featured the now ubiquitous bolt-on neck design. This made production easier and was thought, at the time, as a way to allow the neck to be removed for servicing or replacement.


Where To Start

I started watching prices of necks and bodies on Ebay, and initial findings showed lots of necks up for sale but not that many 2nd hand bodies. The end-of-auction prices tended to be £90 or more, and don't even consider trying for a real Fender one because they just fetch silly money. It began to dawn on me that it would be far cheaper to buy a complete guitar. There are also lots of new bodies for sale around this price point, but it was starting to feel like an expensive way to buy a cheap guitar.

So, the project was dead unless I could find a cheap body. It needed to be ash or alder, not mahogany and I didn't particularly want the semi-hollow Thinline style.

Then it happened,.. I saw this, threw in a last minute bid and managed to pick it up for £30.

I didn't have an exact criteria, but I think this is either ash or alder, and it's got that lovely oak burl veneer and black binding. It's never had a pick guard fitted, the neck pickup is routed for a mini humbucker, and no string holes through the body. The pickup and control cavities are at least partially shielded with copper tape, but someone's gouged some of the routing with a chisel or something.

  1. The control cavity is deeper where the selector switch was. I'm guessing they fitted a bigger switch unit. Okay, that saves me a job.
  2. It was only when I started measuring the bridge cavity that I realised that the hole was too big for the vintage ashtray style bridge. They're 86mm long, and looking at the marks in varnish, the previous one had been 97mm. My heart sank a little.
A simple painted body could be repaired, but this will look horrible with the missing veneer. I will have to buy the bigger bridge that the modern Telecaster Standards are fitted with. They have the six saddles which give a better intonation, but I'd been toying with the idea of going old school and just having the original three. I was going to fit compensated brass saddles so that it would intonate better, but now it seems that my decision had been made for me.

Okay, so now I had the body, the project has started, what next?

The neck of course!

On to part 2

Wednesday, 29 August 2018

The Rise Of Pseudo-Science (flat-earth example)

Introduction

When I was growing up, science was all about truth. It was about proving things by experimental observation. We started off our adventures at school proving relatively simple things like how Hooke's law applies to weights on springs, building on from there, and soon find that you have to rely other peoples work. You accept they are true because their hypothesis has been scrutinised by other scientists and that their experimental evidence successfully reproduced.

It's called “scientific method”, someone has an idea, finds a way to prove it, publishes to their peers and they check it. (It's worked well for hundreds of years)

But our world is changing and with the rise of the internet anyone can publish. It doesn't have to be true, it doesn't have to be checked, and even if it's later proven to be wrong it's unlikely to get taken down. Alongside that we've had a growing movement of conspiracy theorists who are taking advantage of the ease of spreading their ideas.

The all-seeing-eye

People feel increasingly distrustful of their governments and their lack of control in life. But why do people fall for bad science when there's plenty of evidence to the contrary if they choose to go looking for it?

There's also something called "confirmation bias", we are more likely to trust evidence that supports what we believe, and discard what contradicts it. This means once somebody starts to believe in those sorts of ideas it's almost impossible to argue with them.

The dunning-kruger effect chart shows that as we get a small amount of knowledge we can become very sure of our beliefs, but then if we continue to research, we see the bigger picture and the limits of our original ideas. (that's the dip in the curve)

So Why Use/Abuse Science?

It’s more and more common for scientific principles to be selectively used in an attempt to prove a conspiracy or false belief because of material readily available on the internet. They tend to be from less educated people who can’t be bothered to look completely into an observed phenomena because what they see at the surface supports their ideas

Let me give you a couple of flat-earther examples so you see what I mean.

Flat Earth Example 1

In the first example we’ll use google earth to prove the earth is flat.
  1. Take a location by the sea and make a note of it's altitude using Google Earth.
  2. Take another location hundreds of miles away (also by the sea), and note that altitude.
  3. Using the distance between these points and the Earth Curvature table, see what the height drop would be.

Earth Curvature Table
The theory is that for a two points three hundred miles apart there should be a 11 mile drop, but Google Earth shows them to be at the same altitude.

This is of course utter rubbish, because altitude is height above sea level and we picked two points right by the sea.

Example 2

In the second example we’ll take a satellite image showing the transition of the moon across the earth. The distances involved, and the lens focal length make the moon appear to be quite close to the earth and to be around a third of its size.

The transit of the moon

Now look at this photo taken from lunar orbit during one of NASA's Apollo missions. The moon appears huge (it's close to the camera) and the earth looks small (it's far away).

Lunar orbit showing the earth

"Ahah", say the conspiracy theorists, if that picture really was take from the moon then the earth would fill the sky. "Just look at that first picture!"

It's at times like this that I am reminded of this clip from Father Ted..

It's simple really.

Wednesday, 28 March 2018

Electronics Store Maplin Closing - The End of an Era

Introduction

As a teenager in the late 80's, I was really into electronics. Back then you could build useful circuits for a reasonable cost, making things that were otherwise expensive or unavailable. It was a great hobby to get into, I wanted to be an electronics wizard (although that name seems silly these days) and I considered at some stage I would get a job within the electronics industry. I would regularly read 'Everyday Electronics' magazine, not only for the articles and build details, but for the adverts, and it was on one of these pages that I discovered an electronics mail order company who sold a chunky catalogue at W.H.Smith for just a few quid. It had amazing cover art, details about a huge range of electronics components and included suggested circuit diagrams for most of their semiconductor components. I bought one every year, it became my faithful companion for my many projects and hobbies... and so began my thirty year plus relationship with Maplin.

The Rise and Fall of the Catalogue

The first catalogue was just 28 pages back in 1972, the year the company first started. But it soon became an impressive tome with well organised sections, filled with clear diagrams, data charts and product photographs. You knew exactly what you were buying, and you received exactly what you'd seen. It's not surprising that Maplin was so successful.

Some of the Maplin catalogues from the 80's borrowed from This Blog

As the years went by, the rise of computers and microprocessors had a huge impact on the industry and Maplin did a reasonable job in keeping up with changes in the market. Add to this the flood of cheap Chinese goods entering the country and making your own stuff became a non-starter. They started to stock computer hardware, but PC technology changed too quickly. These items often became obsolete or were overpriced as soon as the catalogues came out. The company was able to mitigate this problem when they created their website, but the result of this was that most people didn't need the catalogue anymore. I still bought one from time to time, but when you knew a reasonable percentage of stock would be unavailable, it no longer seemed relevant.

The Rise and Fall of The Store

The company expanded the number of stores to over two hundred, every town seemed to have one, but I still liked the convenience of mail order. They diversified into consumer products like gadgets, phone accessories, lighting, disco equipment, home security, kids toys and hobbies. Clearly they weren't going to be able to support shops like these by selling LEDs and 555 timers, but each store still sold a limited quantity of components from a counter at the back. They hadn't totally sold-out, but they lost a lot of credibility by selling cheap crap at hiked-up prices.

The company has been acquired by a number of owners over the last thirty years and it was with sadness that I started seeing news articles this year that revealed Maplin was in trouble. Shortly afterwards PwC were called to act as administrators and attempts were made to find a new owner. The reasons cited ranged from a drop in the value of the pound caused by Brexit, to the withdrawal of credit insurance which made it impossible for them to raise capital. But I don't think we should ignore the impact of online services who could easily under-cut their prices. It may just be another one of those high-street tragedies,.. another bricks and mortar company floundering in wake of online retailers like Amazon.


Just another store closing in this Derby Retail Estate

I wouldn't like to say how much I've spent at Maplin over the years, it's always been my go-to store for bits and bobs. But more recently I've found the store seemed to be a little out of touch or less useful than it used to be. As they cut the number of SKU's to reduce cost, I've found myself turning to eBay for those more obscure items. Nevertheless let's consider for a moment how convenient this place has been. How many stores are there where you can easily go for a cable to connect your USB keyboard to your iPad, a spool of solder, or a couple of metres of speaker cable and take it home that day?

Maplin - Closing Down Sale

I've visited the Derby store a few times over the last week, there's a huge sale on with typically 30% off most products. There's some great bargains, but I wish it wasn't so. For my whole adult life you have been there for me Maplin and I will miss you greatly.

Friday, 23 February 2018

Oracle Apex - Forcing Password Change in Custom Authentication

Introduction

If you've created you own authentication scheme in APEX, you may be aware that there's no mechanism to hook into that enforces a password change. Typically you might want your users to change password after 90 days, or if it's just been reset by an admin.

The example in this blog uses a redirect on a global page region to switch to the change password page. It's not a full authentication solution and assumes the following:-
  • You have a table called system_users
  • The table has a column called "expired" which is either '1' or '0'.
  • You have already created a change password page (in my example this is page 106).
  • Page 106 has a process to change your password and reset the "expired" flag.
  • You already have a working authentication and password change function.

Instructions

1 - Create a function to check if your user account is expired.

(My example below assumes you have a "system_users" table with a column called "expired". But it's only a simple example. Write something better!)

Function check_expired(p_app_user varchar2)
 RETURN NUMBER AS
 l_return NUMBER;
BEGIN
  BEGIN
    SELECT 1
    INTO   l_return
    FROM   system_users
    WHERE  expired = 1
    AND    upper(username) = upper(p_app_user));
  EXCEPTION
    WHEN no_data_found THEN
      l_return := 0;
  END;
  RETURN l_return;
END check_expired;


2 - Create an application item called "G_PASSWORD_EXPIRED" and ensure its scope is 'Global'.

3 - Create an application computation for this item, set the computation point to After Authetication and the type to 'PL/SQL Expression'.

The compution will be:-

  check_expired(:APP_USER);
Create an Application Compution for G_PASSWORD_EXPIRED


4 -  Create a global page and add a region called "Redirect".

5 - Set the region type to 'PL/SQL Dynamic Content' and add the following code:-

IF :G_PASSWORD_EXPIRED = 1 THEN
   APEX_UTIL.REDIRECT_URL('F?P=&APP_ID.:106:&APP_SESSION.::&DEBUG.');
END IF;

(NB. Page 106 is the change password page)

6 - Set the Server-side Condition to 'Current Page is NOT in comma delimited list', and list pages you don't want the redirect to be affected by.

(NB. This should be the login page, and the change password page.)

7 - On your change password page, ensure your ChangePassword process sets the G_PASSWORD_EXPIRED item to zero, or you will be stuck in a loop.


Change Password Page Should also Reset G_PASSWORD_EXPIRED

That's all you need... the global page adds a page redirect and no attempt to hack an alternative page allowed me to get around it.

Thursday, 25 January 2018

Powerscript - Processing Changed Files in a Folder

Introduction

I needed to find a way of running an import routine for all CSV files in a folder that have recently changed. To do this I created a Windows Powerscript that looked for files where the archive attribute had been set.

(nb. The archive attribute is always set when a file is created or updated)

The basic process will be:-
  • Get all files in folder (which have the .csv extension).
  • Loop through looking for those with the archive attribute set.
  • If found start a new log.
  • Run my dataload process.
  • If success remove archive bit.
  • Write output to log.
The structure and layout of Powerscript is reminiscent of Perl, the block structures are normal, but comparison operators can catch the unfamiliar out.

The Powerscript

Here's what I came up with:-

$path = "<path_to_files>"
$files = Get-ChildItem -Path $path -filter "*.csv"
$attribute = [io.fileattributes]::archive
$newlog = 0

Foreach($file in $files) {
 If((Get-ItemProperty -Path $file.fullname).attributes -band $attribute) {
   if ($newlog -eq 0) {
    $LogTime = Get-Date -Format "dd/MM/yyyy hh:mm:ss"
    "Processing started: $LogTime" | Out-File import.log
    $newlog = 1
   }
   "File: $file" | Out-File run_rt_forecast.log -Append
   $scriptOutput = &<my_external_process> $file.fullname 2>&1
   if($?) {
    Set-ItemProperty -Path $file.fullname -Name attributes -Value ((Get-ItemProperty $file.fullname).attributes -BXOR $attribute)
   }
   Foreach($out in $scriptOutput) {
    "$out" | Out-File run_rt_forecast.log -Append
   }
  }
}

Having spent a lot of time working with Perl, I found it okay to use. There's quite a nice Windows PowerShell ISE which does a reasonable job of allowing you to develop and test in one place. I was also able to open my log file here, but it's a shame it doesn't offer to reload the file when it detects a change.

Gotcha's

Just a few things that caught me out..
  • Ensure you give your script name an extension of ".ps1".
  • When testing, remember to use a Powershell not an ordinary Command Window.

Monday, 4 December 2017

Secret Santa - Without a Facilitator Using QR Codes

Introduction

We decided to introduce our younger kids to joy of giving gifts this Christmas by organising a Secret Santa. But we all want to have the fun of guessing who the secret santa is, so decided to find a way that didn't use a facilitator. In addition to that, two people had to be included over Facetime, giving them the same experience, and preserving their secrecy.

There are ways to do this using websites and apps, but I wanted to be able to do this with paper, drawing evelopes from a box, and so I could supply a generic label for everyone to use.

The Problem

There are basically two rules in this endevour:
  • ensure you don't pick yourself.
  • maintain secrecy at all times.
I needed a way that envelopes could be uniquely identified, but not without some work. They should all look the same to the naked eye so nobody should be able to see when their envelope has been drawn, yet the drawer should be able to effectively reject their own.

Thinking back to my post on treasure hunts the other year, this seemed like a job for QR Codes!

Printing Codes

Find yourself a good QR code generator, (I used http://www.qr-code-generator.com/), but you can also create them in QR Reader Apps on your phone.

1 - Start out by creating a load of codes based on simple numbers, to fix to your envelopes. Print them out at a size of around 1 inch square.

Envelope Identifiers (1-7)

2 - Then create a set of labels with the recipients name and any other details you'd like to add. (I added their Christmas Elf name details from http://christmas.namegeneratorfun.com/ )

Label for my son Saul

Finally I printed off a note for each person. You don't need a QR code on this, and it could just be a bit of paper with their name.


Saul's Note & Instructions

OK, now you're ready to start.

Running the Selection Process

Follow these instructions:-
  1. Fix the envelope identifier QR codes to the outside of your envelopes in a way that they all appear to be the same. (note the orientation of the corner blocks). Use a glue stick so that the label may be removed near the end.
  2. Give each person their own note and label, and a randomly selected envelope.
  3. Each person should then seal these inside their envelope. 
  4. Everyone should then scan their envelope code with their phone to find out their number/id and then post the envelope into a box.
  5. Shake the box to mix up the envelopes and have each person draw one in turn, while others wait at the far end of the room.
  6. After selecting they should scan the QR code and ensure it doesnt belong to them. (if so, have them replace it and take another)
  7. Peel off the QR code and place it in the box, then they should open the envelope in secret.
(Repeat 5-7 for all)

nb. Those joining on Facetime will need an assistant in the room to hold their envelope up to the camera so the remote person can scan it. After drawing the envelope (in step 5) the assistant will also have to write their name and either post it, or find a way of getting it to them.

Hope you find this useful, have a nice holiday.