Thursday, 22 May 2014

Oracle Apex - Adding Region Help

Oracle APEX Help Text

Occasionally at work I build systems using Oracle's Application Express and I find I have to stop the web developer within me from going overboard and solving problems in a non APEX way. We had just completed a new system for managing customer discounts and had asked the system owner to come up with field and page help for the application. After a few days we received a spreadsheet full of descriptions and help for most of the pages, but to my surprise they'd included region help. The latter being something that isn't currently implemented in vanilla APEX.

Just to explain a little for those not conversant in APEX, systems are built from a number of pages, and each page can be essentially a report or form. You can have a mix of these by using regions, but as everything must be in a region anyway it's really a case of adding extra regions. Additionally it can be beneficial to split forms across multiple regions to aid clarity or group by function. The following example shows percentage fields used to capture discount percentages for a customer.

Standard Form Region in APEX.
Item help has already been added to this region and this can be seen by clicking one of the labels. This runs a JQuery function called 'popupFieldHelp' and generates a fancy popup like this example.

Item Help Example.

So far all perfectly normal, there's nothing new here!

Additionally these items appear on the Page Help, grouped together under a section title that matches their region title.

What About Region Help?

So everything was great until we were asked for a region help, but as the requirement was valid I couldn't just discard the idea. But I didn't want to write custom JQuery code because my non-developer colleague may need to update it, and I also wanted it to appear in the page help. Here's what I came up with...

1. Add a 'Display Only' page item to your region and choose a sensible name.

(In our example this will be 'P19_ADDITIONAL_DISCOUNTS_HELP').

2. Set the Label text to reference the region name, to be shown in the page help.

(I used 'Additional Discounts Region' for my label.)

3. Add the help text to the item in the normal way entering your region help text.

4. Move the item so that it is first in the region and run the page.

5. Test your new help text by clicking on the item label, then right click it and copy the link code.

(nb. In Firefox this is 'Copy Link Location' and in Internet Explorer it is 'Copy Shortcut'.)

6. Paste the link code into Notepad (or similar) and you should have something like this..

javascript:popupFieldHelp('3439324541165905','112943106205802')

(nb. The first number is your item number, the second is the session number)

7. Edit the region and alter the title to..

<a class="uHelpLink" href="javascript:popupFieldHelp ('xxxxxxxxx','&APP_SESSION.')">Additional Discounts</a>

Where xxxxxxxxx is your item number that we found in the previous stage.

8. Save and run the page and your title will now show as a link (see image below).

Region Help Linked To Region Title.
9. Click the title link and check it works.

10. Finally edit the page again and set the item to 'Hidden' so that it's label no longer shows in the region.

(nb. The item help box will now be hidden when editing the item, but it's still there and available to page and item popup help functions.)


Update, 20/01/2015 Method adapted for tabular form columns.

Monday, 19 May 2014

Restoring Java 1.6 on a PowerPC Mac


The Problem

The kid's old G4 Mac Mini was superceeded last year by a more modern intel version which has taken over the duties of Web Browsing, Minecraft and StarCraft.

My oldest son used to live and breath Minecraft, but it fell out of favour a few months back and although the new server still runs his creations, it tends to only get used by his old friends. I think he wanted it to be packed with people, but as it's a small private server using a domestic internet connection I argued this wasn't really fair on the rest of us. As time went on it became less about creating and more about minecraft based activities, although there's some pretty amazing creative stuff on there.

It concerned me though that my server investment was being wasted, so I decided to introduce my two younger sons (5 and 7) to a very much simpler version of Minecraft. I added another service on port 25566 using server version 1.5.2, but then I ran into a problem.

My plan was to hook the old PowerPC Mac Mini to my TV and use that as a second machine, so both boys can play at the same time. This should avoid the "waiting for their turn" issues that we frequently get and be more fun for them. But somewhere along the way an Apple update has removed Java 1.6 (for security reasons) and dumped it back to 1.5, and this version won't run later versions of Minecraft or the loader. Apples recommendation, get it from Oracle (we don't supply it anymore)

Between a rock and a hard place.

I'll admit the G4 Mac Mini is getting as little old; I think I bought it in 2006 so a friend could edit his holiday video. It went on to serve as a loan machine for a few years until we finally set it up for the kids. If I'd have waited another 6 months it would have been an Intel version (sighs), but nobody saw the switch to Intel coming.

So guess what, Oracle don't supply a PowerPC version of Java anymore (in fact I'm not sure they ever did, because Apple still supplied it up to 1.6) None of the Apple update links for Java work anymore (archived) and any updates I do find just install later versions of 1.5, and there's little hope of 1.7!

I did manage to find some v1.6 files after the JavaV8 Apple update, but curiously it didnt show up in Java Preferences. Then when I hacked it into use by altering the symbolic links in /system/library/Frameworks/javaVMs/versions it politely informed me that it was the wrong CPU type.

/System/Library/Frameworks/JavaVM.framework/Versions/CurrentJDK/Commands/java -version
/System/Library/Frameworks/JavaVM.framework/Versions/CurrentJDK/Commands/java: Bad CPU type in executable

So I'm looking at scrapping this machine because it's CPU is not supported anymore, or find a creative way of getting around the problem.

Soylatte or Bust

After a lot more googling I found Soylatte, their site had binaries and after install I ran java -version is proudly reported version 1.7.

Add to your path to get it to run..

export PATH=/usr/local/soylatte16-amd64/bin:$PATH       
(or what ever you called your install dir)

I had high expectations, but this is a Beta Java Developer Kit (JDK), all we want is the Runtime or JRE. Something's not right though because I'm not able to get Minecraft to run and now Java Preferences fails to start.

I went back to googling for answers and ideas, but I didn't find anything new.

So what are my options now?
  • Chuck it in the skip. (buy intel one)
  • Install Linux MintPPC (more investigation required)
  • Replace logic board with Core 2 duo version. (not even sure this will work)

Monday, 31 March 2014

DRM & Copyright

What do you mean it's illegal?


From June 1st it will become *legal* to rip your CDs in the UK.

"What?", I hear you say, "I didn't know it wasn't"

Yeah, that's a common thing I hear because it's an unjust law that nobody pays any attention to. Most see that if you can freely import music into iTunes (or similar) then how can it be illegal. Somehow the music industry managed to sneak that by us. They assumed we'd just roll over and re-buy our content again using whatever download service our phones or music players supported.

Essentially they scared our governments into accepting these measures to protect what they called a fragile economy. Completely ignoring the fact that if they produced a good product at a reasonable price then people would buy it. On top of that they introduced Digital Rights Management (DRM) stopping the consumer from choosing how they used the contents they'd purchased, in addition making it technically impossible (or at most difficult) to make a fair copy.

Anyone investing any time breaching these measures is then clearly a pirate!

Times they are a changing

It's all part of our broken Copyright and Patent system which has now been investigated in the Hargreaves report, and this has identified a number of small reforms. The Intellectual Property Office recently made the following statement..

"The changes make small but important reforms to UK copyright law and aim to end the current situation where minor and reasonable acts of copying which benefit consumers, society and the economy are unlawful"

..And this to include all digital formats, not just music CDs. So the days of device lock-in might be numbered. So all that stuff you bought on your kindle, why not "format shift" it so that any digital e-reader can open it?

This includes DVDs and Bluray discs which is also currently encumbered with strong DRM, so in practice I'm not sure how that's going to work. The changes excludes Computer Software, but it's unclear how things like games could ever be copied to another format that you might own, but I for one would like to make a backup copy of any discs I own so it seems lacking.

Back to Reality

I can't see any time soon that we'll be seeing video discs that don't have DRM and content region restrictions. It's going to take a bigger change in the law before that happens because big business just doesn't want to let the genie out of the bottle. But it's like the blocking of the Pirate Bay web site, it won't stop the small percentage of people from obtaining content via illegal methods, but we all suffer in the mean time!

Wednesday, 11 December 2013

Minecraft Backup for MultiWorld servers

Basic Server Backup

One of the main reasons we built our new Linux server was to be able to run a simple Minecraft server, but as time's gone by we've moved to a more sophisticated configuration. We started out by switching from vanilla Minecraft to (plug-in friendly) CraftBukkit and from there we've experimented with various plug-ins that improved security or added enhancements to the game.

We've always used the linux startup script from the minecraft wiki and this gives us the added benefit of easy world backups without having to shut the service down. Backups are triggered from an entry in the crontab as below.

10 23 * * * /etc/init.d/minecraft backup

Here the backup option is triggered at 23:10 every day and generates the following entries in the minecraft server log.

2013-12-01 23:10:01 [INFO] [Server ] SERVER BACKUP STARTING. Server going readonly...
2013-12-01 23:10:01 [INFO] CONSOLE: Disabled level saving..
2013-12-01 23:10:01 [INFO] CONSOLE: Forcing save..
2013-12-01 23:10:03 [INFO] CONSOLE: Save complete.
2013-12-01 23:10:19 [INFO] CONSOLE: Enabled level saving..
2013-12-01 23:10:19 [INFO] [Server ] SERVER BACKUP ENDED. Server going read-write...  

MultiSite Backup

It wasn't long before we had the Multi-World plug-in installed and a dozen new Worlds linked in. My son built a linking portal with teleports to all of the new worlds and it was great, but it became apparent that these weren't being backed up by the startup script.

Mojang's script covers just the main world which is defined in the #Settings section at the top of the file. (see example below)

#Settings
SERVICE='craftbukkit.jar'
OPTIONS='nogui'
USERNAME='root'
WORLD='Plop'

OTHERWORLDS='creative hungergames spawn griefcity'
MCPATH='/opt/minecraft'
BACKUPPATH='/TimeMachine/DailyBackup/minecraft'
MAXHEAP=2048
MINHEAP=1024
HISTORY=1024
CPU_COUNT=1

I added a new variable called 'OTHERWORLDS' and I populated it with a list of the worlds currently being missed. (Note: these are separated by a space character so make sure the worlds don't include spaces in their names)

Next I altered the backup section of the script to loop through the OTHERWORLDS list and add each world directory to the backup tar file. (see script below)

mc_backup() {
mc_saveoff
NOW=`date "+%Y-%m-%d_%Hh%M"`
BACKUP_FILE="$BACKUPPATH/${WORLD}_${NOW}.tar"
echo "Backing up minecraft world…"
#as_user "cd $MCPATH &amp;&amp; cp -r $WORLD $BACKUPPATH/${WORLD}_`date "+%Y.%m.%d_%H.%M"`" as_user "tar -C \"$MCPATH\" -cf \"$BACKUP_FILE\" $WORLD"

  for i in $OTHERWORLDS
  do
    as_user "tar -C \"$MCPATH\" -rf \"$BACKUP_FILE\" $i"
  done

echo "Backing up $SERVICE"
as_user "tar -C \"$MCPATH\" -rf \"$BACKUP_FILE\" $SERVICE"
#as_user "cp \"$MCPATH/$SERVICE\" \"$BACKUPPATH/minecraft_server_${NOW}.jar\""

mc_saveon

echo "Compressing backup..."
as_user "gzip -f \"$BACKUP_FILE\""
echo "Done."
}

Now when the backup runs the main world is backed up to a daily tar file and then the other worlds are added to it. (It will create a TAR file named after your main world and a timestamp)

Possible Updates

The only real problem with this script is that is doesn't cater for world names containing spaces. This was initially an issue that I struggled to fix, and in the end I took the easy option and altered the world name to remove the offending character.

But as is often the case the script is good enough, so I have no plans to fix it.

Update

An improved method can be found here http://theperfectbeast.blogspot.co.uk/p/linux-minecraft-server-script.html

Thursday, 24 October 2013

BlueStacks Android Emulator

Android Emulation

My new TV has an android and iOS App as an alternative to the old fashioned remote control. I sometimes use this on my iphone or ipad, but because the App can also be used to stream what's on the TV, I want to run it on my Laptop too.

When I started looking into this I discovered you could run an Android disk image in a VM such as VirtualBox. But I carried on looking for a hassle free way and eventually found an emulator called BlueStacks App Player. The best thing is that it's available for both Windows (XP, Vista, Win7/8) and Mac OSX (which is still in Beta right now) and it's FREE.

Installing BlueStacks

After downloading the install went easily, but it took some time to start up. So go and make yourself a cup of tea or something, you've got something like a 5 minute wait.
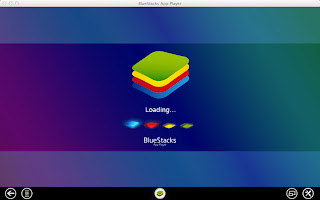
BlueStacks Loading Screen - Takes A While

Once initialised you come to a My App screen where you'll see there's a few popular apps preloaded. But click on the Top Charts icon to start adding new ones.

If you're running a laptop with a standard trackpad then you can scroll up and down through the lists quite easily, but you might have problems if you use a mouse. I struggled a bit with my aging Mighty Mouse because the little scroll ball doesn't work very well anymore.

(I couldn't find any other way of page scrolling)


The Charts Screen - Lets Add Some Apps

Click on the search icon (the blue magnifying glass) you'll find all of the apps that you could ever want (and loads more besides). Sadly my TV app refused to install but I did find that most of the popular games I tried worked fine.

As soon as you make a selection BlueStacks will take you through the login or registration process. I then turned off the automatic account syncing because I don't have any other Android devices (although it listed my old phone in the Google account details as a registered device).


Angry Birds - The Defacto Test

Generally it works great (even if my TV app was a no-go) so I went on to install it on the kid's Mac Mini. I left them playing "Cut The Rope" as most things run ok with a mouse, and then half an hour later I noticed they'd installed and were playing other games.

It's that easy to use, it's kid's play!

I hope this has been some use to those who want to run a android apps on their laptop or desktop computer. It's easy to do and completely free, so don't waste any more time, lets get those green piggies.

Monday, 14 October 2013

Minecraft Server Log Web Interface

Introduction

If you run a Minecraft server in Linux then you'll probably like to keep track of what's going on in the server log. I found that it was a real pain having to remote shell into the server all the time and if it was available via a web browser I could keep track of it more conveniently, or by using my phone or tablet.

I decided that I would use PHP (even though PERL is generally my scripting weapon of choice) and once I'd found the correct commands and syntax it came together quite quickly. If you fancy giving it a try you just need a web server (such as Apache) and of course PHP running on your server.

How it works

It started out being a simple process of opening the server.log file and outputting each line as pre-formatted html.

Something like this..

<html>
<head><title>Minecraft Log</title></head>
<body><pre>
<?php
$filepath = "/opt/minecraft/server.log";
$file = file($filepath);
foreach($file as $line) {
    echo $line."<br/>\n";
}
?>
</pre></body>
</html>

This was great at first, but after we'd been running for a few weeks the server.log file gets too big and the web page gets slower and slower to load. What we needed was a way of only showing the current days log entries, and maybe a date selector so you can reference older stuff.

So I created version two with the following enhancements:-
  • Default to showing today's log entries.
  • A date selector is added to the top of the web page which sends the new value if altered.
  • If page requested with a date parameter then use this instead of today's date.
  • If no date has been passed then run a javascript function to scroll the log section to the bottom.
There's a nice feature in the log where text is coloured. This would typically be for chat or system warnings, but as it stood they left messy control codes littered about the log. Rather than remove these I decided to replace them and style the text to match these colours.

This enhancement required the following:-
  • Create a series of regular expression replaces to match the control codes.
  • Each colour code instance is replaced by a span tag which corresponds to a set of pre-defined styles (the css for these is defined in the head section).
  • Put log into a scrollable div.
Here's the completed code..

<!DOCTYPE html>
<html>
<head>
<title>Minecraft Log</title>
<style>
    #log{
        height:400px;
        overflow-y: scroll;
        margin: 5px 0 0 1px;
        border: 1px solid;
    }
    .green{color: green;}
    .red{color: red;}
    .purple{color: purple;}
    .black{color: black;}
    .blue{color: darkblue;}
    .gold{color: gold;}
    .cyan{color: darkcyan;}
    .aqua{color: cadetblue;}
    .gray{color: #888;}
    .bold{ font-weight:bold;}
</style>
<script>
    function scroll(){
    //scroll div to bottom
    var objDiv = document.getElementById("log");
    objDiv.scrollTop = objDiv.scrollHeight;
    }
</script>
</head>
<?php
$pass = htmlspecialchars($_POST["date"]);
if (!$pass){
    echo "<body onLoad='scroll()'>";
}
else {
    echo "<body>";
}

$filepath = "/opt/minecraft/server.log";
$file = file($filepath);
$dates = array();
$last = "";


/* Get List Of Dates */
foreach($file as $line) {
    $date = substr($line, 0, 10);
    if ($date != $last){
        if(preg_match('/\d{4}\-\d{2}\-\d{2}/',$date)) {
            array_push($dates, substr($line, 0, 10));
            $last = $date;
        }
    }
}

/* If Date Provided Use This */
if(preg_match('/\d{4}\-\d{2}\-\d{2}/',$pass)) {
    $last = $pass;
}

/* Add Form Element and Date Selector */
echo "<form method='post'>Select date: <select name='date' onchange='this.form.submit()'>\n";
foreach($dates as $value){
    $select = "";
    if ($value == $last){ $select = " selected='selected'"; }
    echo "<option value='".$value."'".$select.">".$value."</option>\n";
}
echo "</select></form>\n";

/* Output Log For Required Date */
echo "<div id='log'>";
foreach($file as $line) {
    /* Remap Problem Characters */
    $line = preg_replace("/</","&lt;",$line);
    $line = preg_replace("/>/","</span>&gt;",$line);
    $date = substr($line, 0, 10);
    if ($date == $last) {
        /* Remove Unrequired Formatting Codes */
        $line = str_replace("[m","",$line);
        $line = str_replace("[21m","",$line);
        $line = str_replace("[3m","",$line);
        /* Split Log Line Into Sections to Using First Formatting Code Style */
        $segarray = preg_split( '/(\[0|\[m)/', $line );
        for ($i = 1; $i < count($segarray); ++$i){
            /* Do Replace to Add Styled Spans */
            if (preg_match('/;\d{2};\d+m/', $segarray[$i])) {
                $segarray[$i] = preg_replace("/;30/","<span class='black",$segarray[$i]);
                $segarray[$i] = preg_replace("/;31/","<span class='red",$segarray[$i]);
                $segarray[$i] = preg_replace("/;32/","<span class='green",$segarray[$i]);
                $segarray[$i] = preg_replace("/;33/","<span class='gold",$segarray[$i]);
                $segarray[$i] = preg_replace("/;34/","<span class='blue",$segarray[$i]);
            $segarray[$i] = preg_replace("/;35/","<span class='purple",$segarray[$i]);
                $segarray[$i] = preg_replace("/;36/","<span class='aqua",$segarray[$i]);
                $segarray[$i] = preg_replace("/;37/","<span class='gray",$segarray[$i]);
                $segarray[$i] = preg_replace("/;22m/","'>",$segarray[$i]);
                $segarray[$i] = preg_replace("/;1m/"," bold'>",$segarray[$i]);
                $segarray[$i] = $segarray[$i]."</span>";
            }
        }
        /* Rejoin Then Split Log Line Using Second Formatting Code Style */
        $line = join("",$segarray);
        $segarray = preg_split( '/§/', $line );
        for ($i = 1; $i < count($segarray); ++$i){
            /* Do Replace to Add Styled Spans */
            $segarray[$i] = preg_replace("/^0/","<span class='black'>",$segarray[$i]);
            $segarray[$i] = preg_replace("/^1/","<span class='blue'>",$segarray[$i]);
            $segarray[$i] = preg_replace("/^2/","<span class='green'>",$segarray[$i]);
            $segarray[$i] = preg_replace("/^3/","<span class='aqua'>",$segarray[$i]);
            $segarray[$i] = preg_replace("/^4/","<span class='red'>",$segarray[$i]);
            $segarray[$i] = preg_replace("/^5/","<span class='purple'>",$segarray[$i]);
            $segarray[$i] = preg_replace("/^6/","<span class='gold'>",$segarray[$i]);
            $segarray[$i] = preg_replace("/^7/","<span class='gray'>",$segarray[$i]);
            $segarray[$i] = preg_replace("/^8/","<span class='gray'>",$segarray[$i]);
            $segarray[$i] = preg_replace("/^9/","<span class='blue'>",$segarray[$i]);
            $segarray[$i] = preg_replace("/^a/","<span class='green'>",$segarray[$i]);
            $segarray[$i] = preg_replace("/^b/","<span class='aqua'>",$segarray[$i]);
            $segarray[$i] = preg_replace("/^c/","<span class='red'>",$segarray[$i]);
            $segarray[$i] = preg_replace("/^d/","<span class='purple'>",$segarray[$i]);
            $segarray[$i] = preg_replace("/^e/","<span class='gold'>",$segarray[$i]);
            $segarray[$i] = preg_replace("/^f/","<span class='black'>",$segarray[$i]);
            $segarray[$i] = preg_replace("/^r/","<span class='black'>",$segarray[$i]);
            $segarray[$i] = $segarray[$i]."</span>";
        }
        /* Rejoin and Output to Webpage */
        $line = join("",$segarray);
        echo $line."<br/>\n";
    }
}

echo "</div>";
?>
</body>
</html>

nb. Notice the log must now be read twice!

Installation Instructions

Copy the code into a file called index.php and drop it into a directory accessible to your web server and ensure you grant the file execution rights.

Alter the $filepath = "/opt/minecraft/server.log"; line so that it points to your server log and ensure the web server has read rights to this file.

How to Use

Just open the PHP code in your browser and the a page should open showing today's log entries, scrolled to the bottom of the log.

If you then select an earlier date the page will refresh and show this dates entries without the auto-scrolling.

Friday, 4 October 2013

OSX Time Machine kills old disks

Round 1

Earlier this year I decided to replace the disk in my Macbook Pro with an SSD. The HDD was only a year old but I was already having problems that required frequent fixing in DiskUtility. Also those odd clicking noises it was making were making me feel nervous.

I decided to backup asap (once I'd fixed the disk again) and set about manually copying my data to an external disk in the finder window. After is kept failing on a bad block I decided to try and update my Time Machine backup instead. It ran for a while and then the machine froze, forcing me to reboot the machine. I then found that the disk was corrupted and Diskutility could see it but refused to touch it.

I bought a copy of Stellar Phoenix Mac Recovery because the demo version showed all my files listed, but after recovering about 200Gb they all proved unusable. Other attempts have proved equally unsuccessful with days of processing not finding any files what-so-ever. My experience of buying recovery software has proven to be a huge waste of money! (I found similar trying to recover ReiserFS partitions)

So I ran fsck (details here) to see if it would fix it..

admin$ fsck /dev/disk1s2 -f

BAD SUPER BLOCK: MAGIC NUMBER WRONG

LOOK FOR ALTERNATIVE SUPERBLOCKS? [yn] y


CANNOT READ: BLK 16585216

CONTINUE? [yn] y

THE FOLLOWING DISK SECTORS COULD NOT BE READ: 16585216, 16585217, 16585218, 16585219, 16585220, 16585221, 16585222, 16585223,

CANNOT READ: BLK 567944160

CONTINUE? [yn] y

THE FOLLOWING DISK SECTORS COULD NOT BE READ: 567944168, 567944169, 567944170, 567944171, 567944172, 567944173, 567944174, 567944175,

SEARCH FOR ALTERNATE SUPER-BLOCK FAILED. YOU MUST USE THE
-b OPTION TO FSCK TO SPECIFY THE LOCATION OF AN ALTERNATE
SUPER-BLOCK TO SUPPLY NEEDED INFORMATION; SEE fsck(8).

So that didn't work then! (I haven't got a clue where I'd find an alternative super-block.)

Round 2

This last weekend I bought a new USB portable disk unit to use as a new Time Machine volume. My wife's Macbook hadn't been backed up since earlier this year so I decided that was the first machine to try it out on.

I hooked up the drive, kicked off Time Machine and left it running. I noticed after about an hour that it was stuck at 48% so I attempted to kill it and start again, but the Macbook refused to respond. In the end I rebooted the machine but wasn't able to get past a blank grey startup screen. I booted from a startup CD can ran DiskUtility but it refused to see the internal disk.

In the end I replaced the HDD (which was 4½ years old) and recovered from her old Time Machine backup. So that's another internal disk that Time Machine pushed over the edge, and this time it refused to show as a drive.

I'm definitely reaching the conclusion that you shouldn't use Time Machine if you have any doubts over the integrity of your hard disk. Make sure you backup regularly and you'll not lose much.

You do backup don't you?

Update (10th Oct)

I've found that Disk Warrior 4.4 can cope with a faulty disk and will mount this disk in read-only mode so that you can copy off your files. It wasn't without it's problems though, the failing disk causing disk copies to occasionally hang on certain files.